Grant Single Subscription Permissions
This guide is to be performed once per Azure Subscription.
The guide assumes that you have already created an Azure App Registration in your Azure Tenant.
If you haven't created an App Registration yet, please follow the Create a New Azure App Registration guide.
This guide will walk you through the process of granting permissions to your Azure Subscription for the Chronom App Registration you created.
Prerequisites
In order to grant permissions to the App Registration, you need to have:
- An Active Azure Subscription.
- An Azure App Registration with a client secret. Create a New Azure App Registration
- The ability to create a custom role in the subscription you want to scan.
- The ability to assign the custom role to the App Registration.
(Those abilities are usually granted by theOwnerrole in the subscription)
Instructions
Create a Custom Role (Recommended)
If you want to grant Chronom the ability to perform a more in-depth scan of your Azure Subscription, you can create a custom role with the necessary permissions.
To create a custom role, follow these steps:
- Azure Portal
- Azure CLI (bash)
- Azure CLI (PowerShell)
-
Download the
Chronom Custom Role JSONfile by clicking here and saving it to your computer. -
Open the Azure Portal.
-
Navigate to the Azure Subscription you want to create the custom role in.
-
Click on the
Access Control (IAM)blade. -
Click on the
+ Addbutton and selectAdd custom role.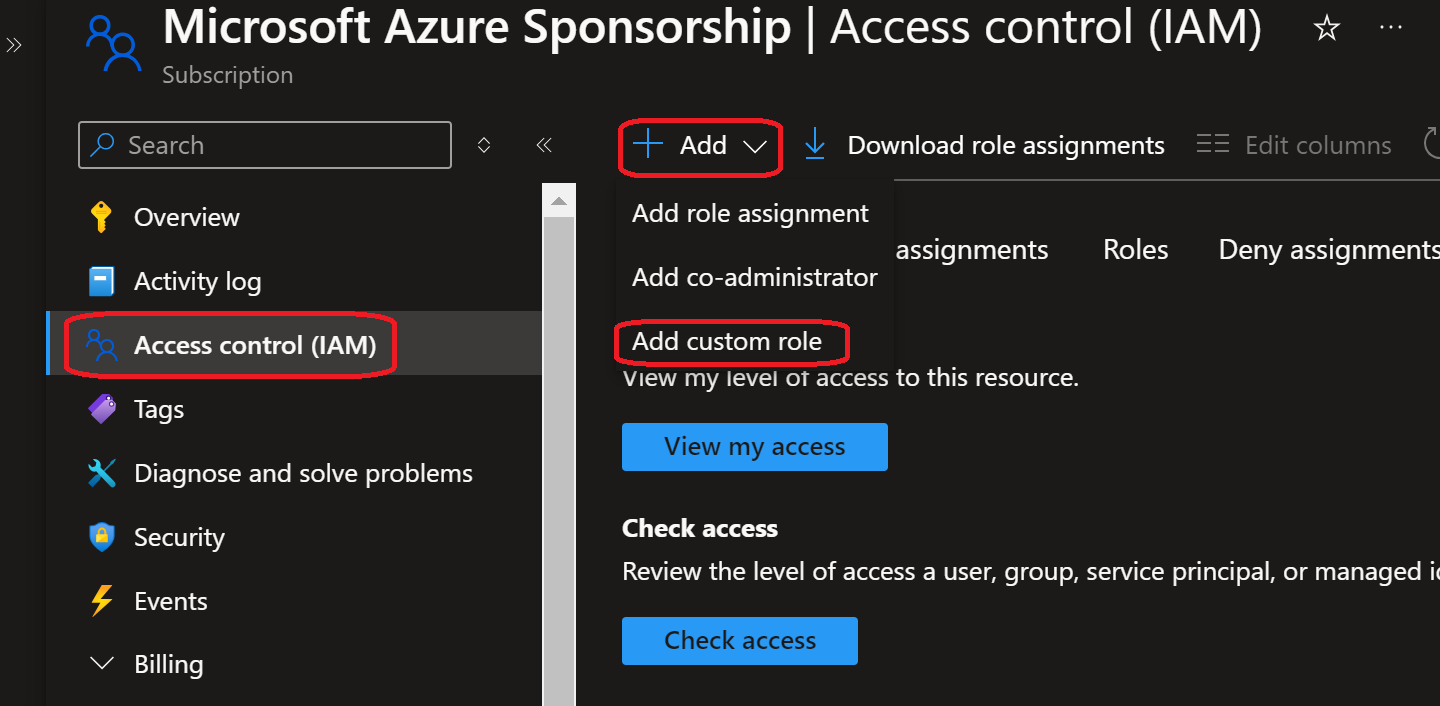
-
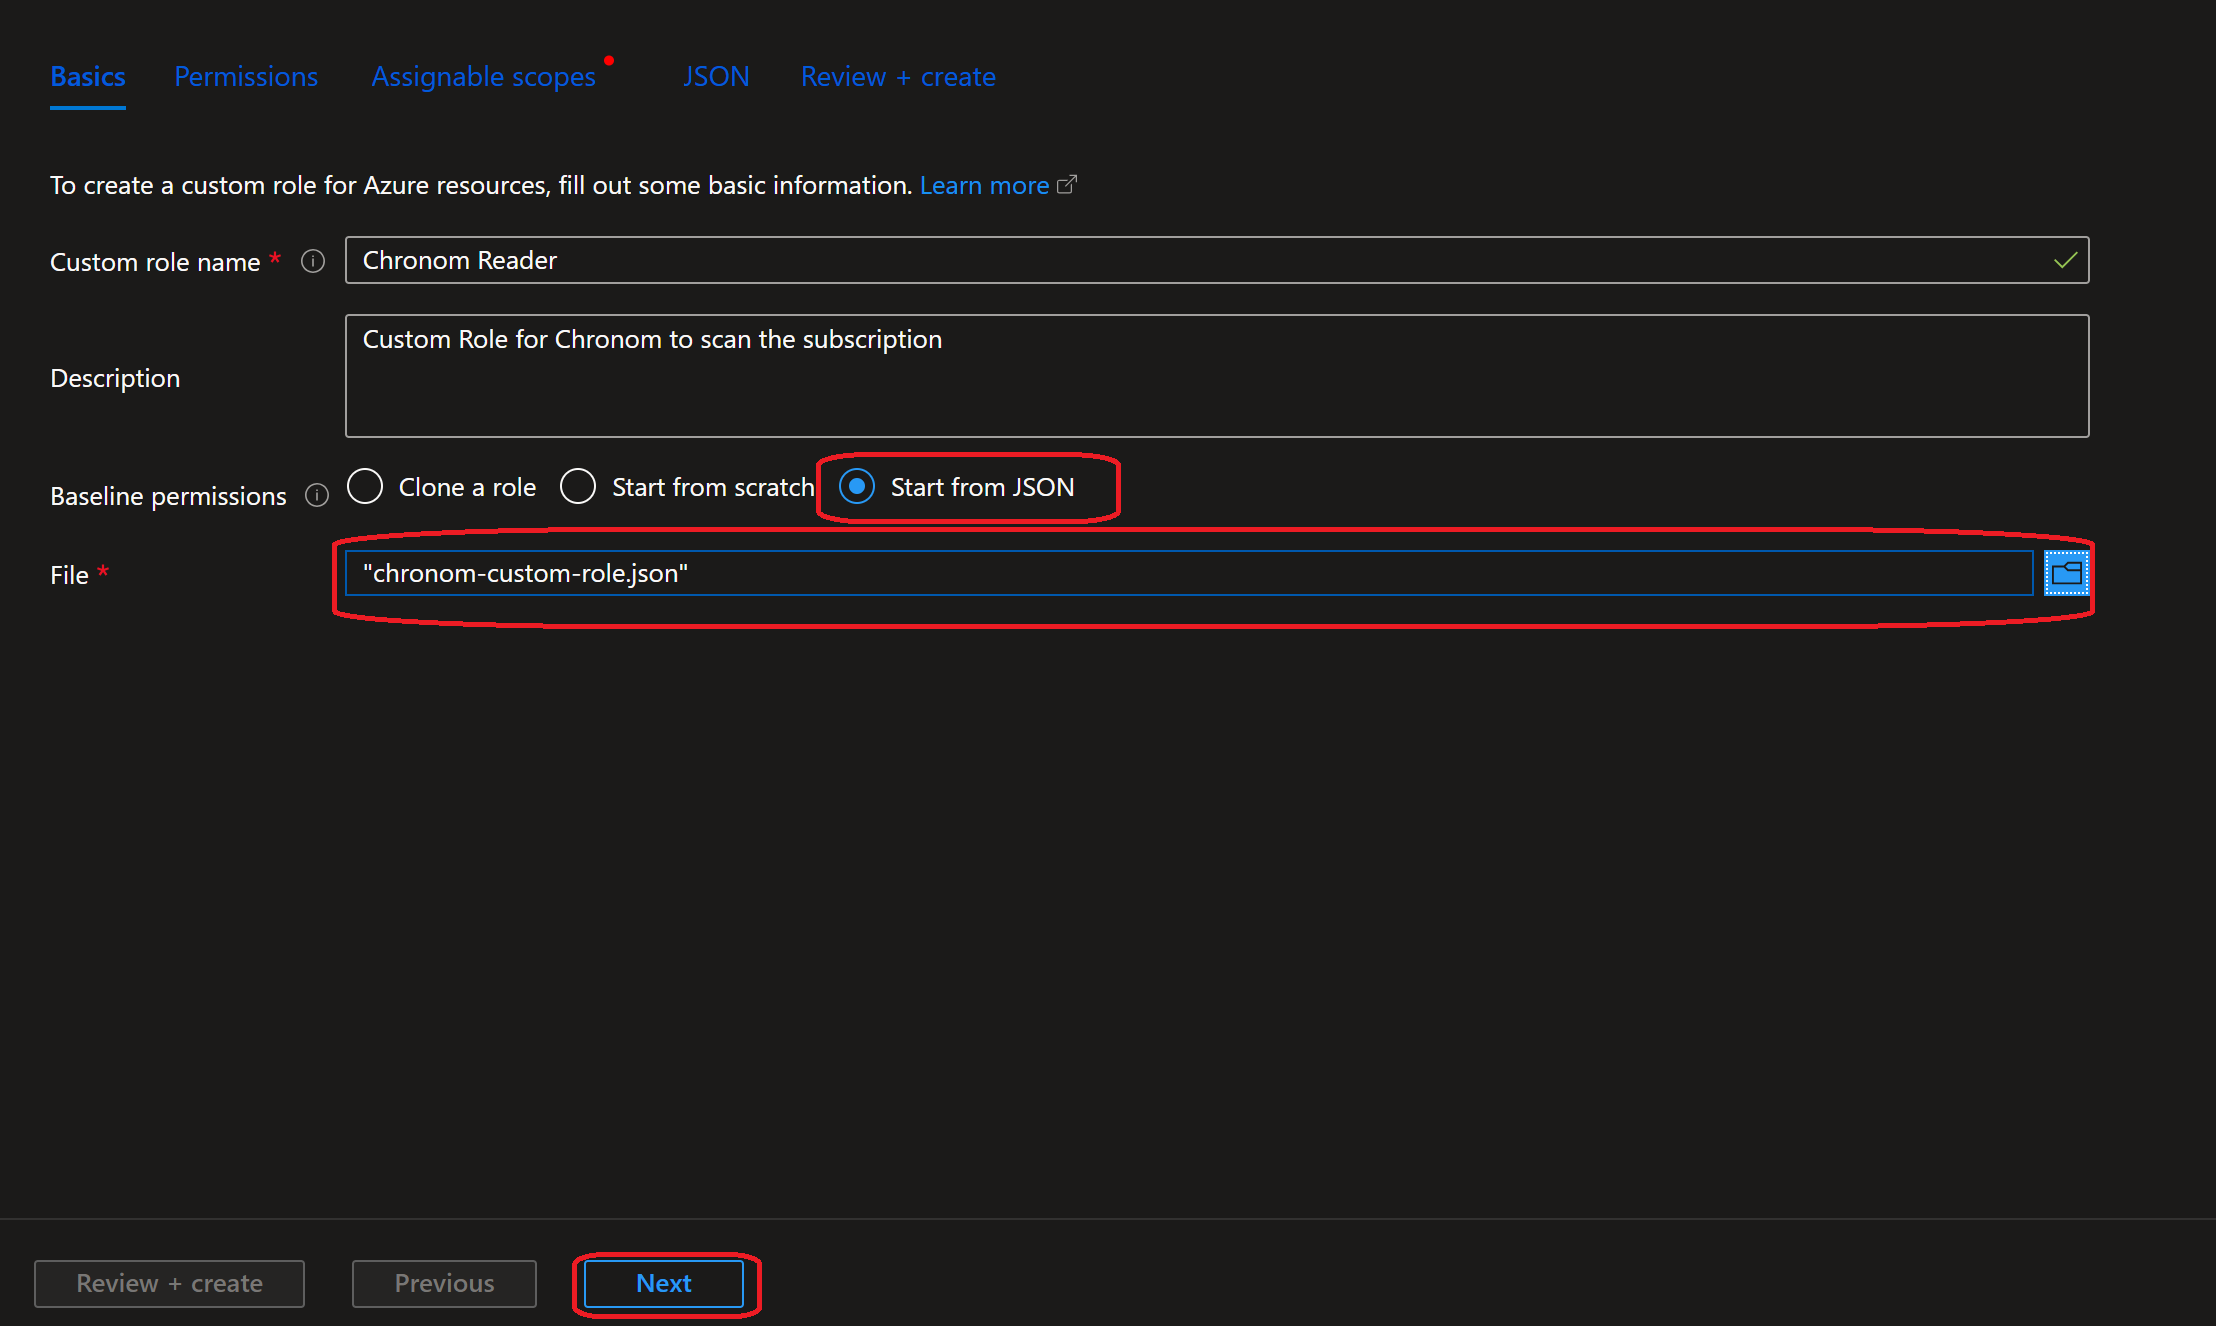
Fill in the following details:
- Baseline Permissions:
Start from JSON - Upload the JSON file you downloaded in step 1.
- Click on the
Nextbutton.
- Baseline Permissions:
-
Review the permissions and click on the
Nextbutton.
If the permissions are too broad, you can remove the problematic permissions by clicking on the 🗑️ icon.
(Any of the permissions can be removed except for the*/readpermissions.)
In addition, you can exclude specific actions by clicking on the+ Exclude permissionsbutton. -
Under
Assignable scopesclickAdd assignable scopes, change the type toSubscriptionand select the subscriptions you want to assign the role to.
Click on theSelectbutton and then clickNext.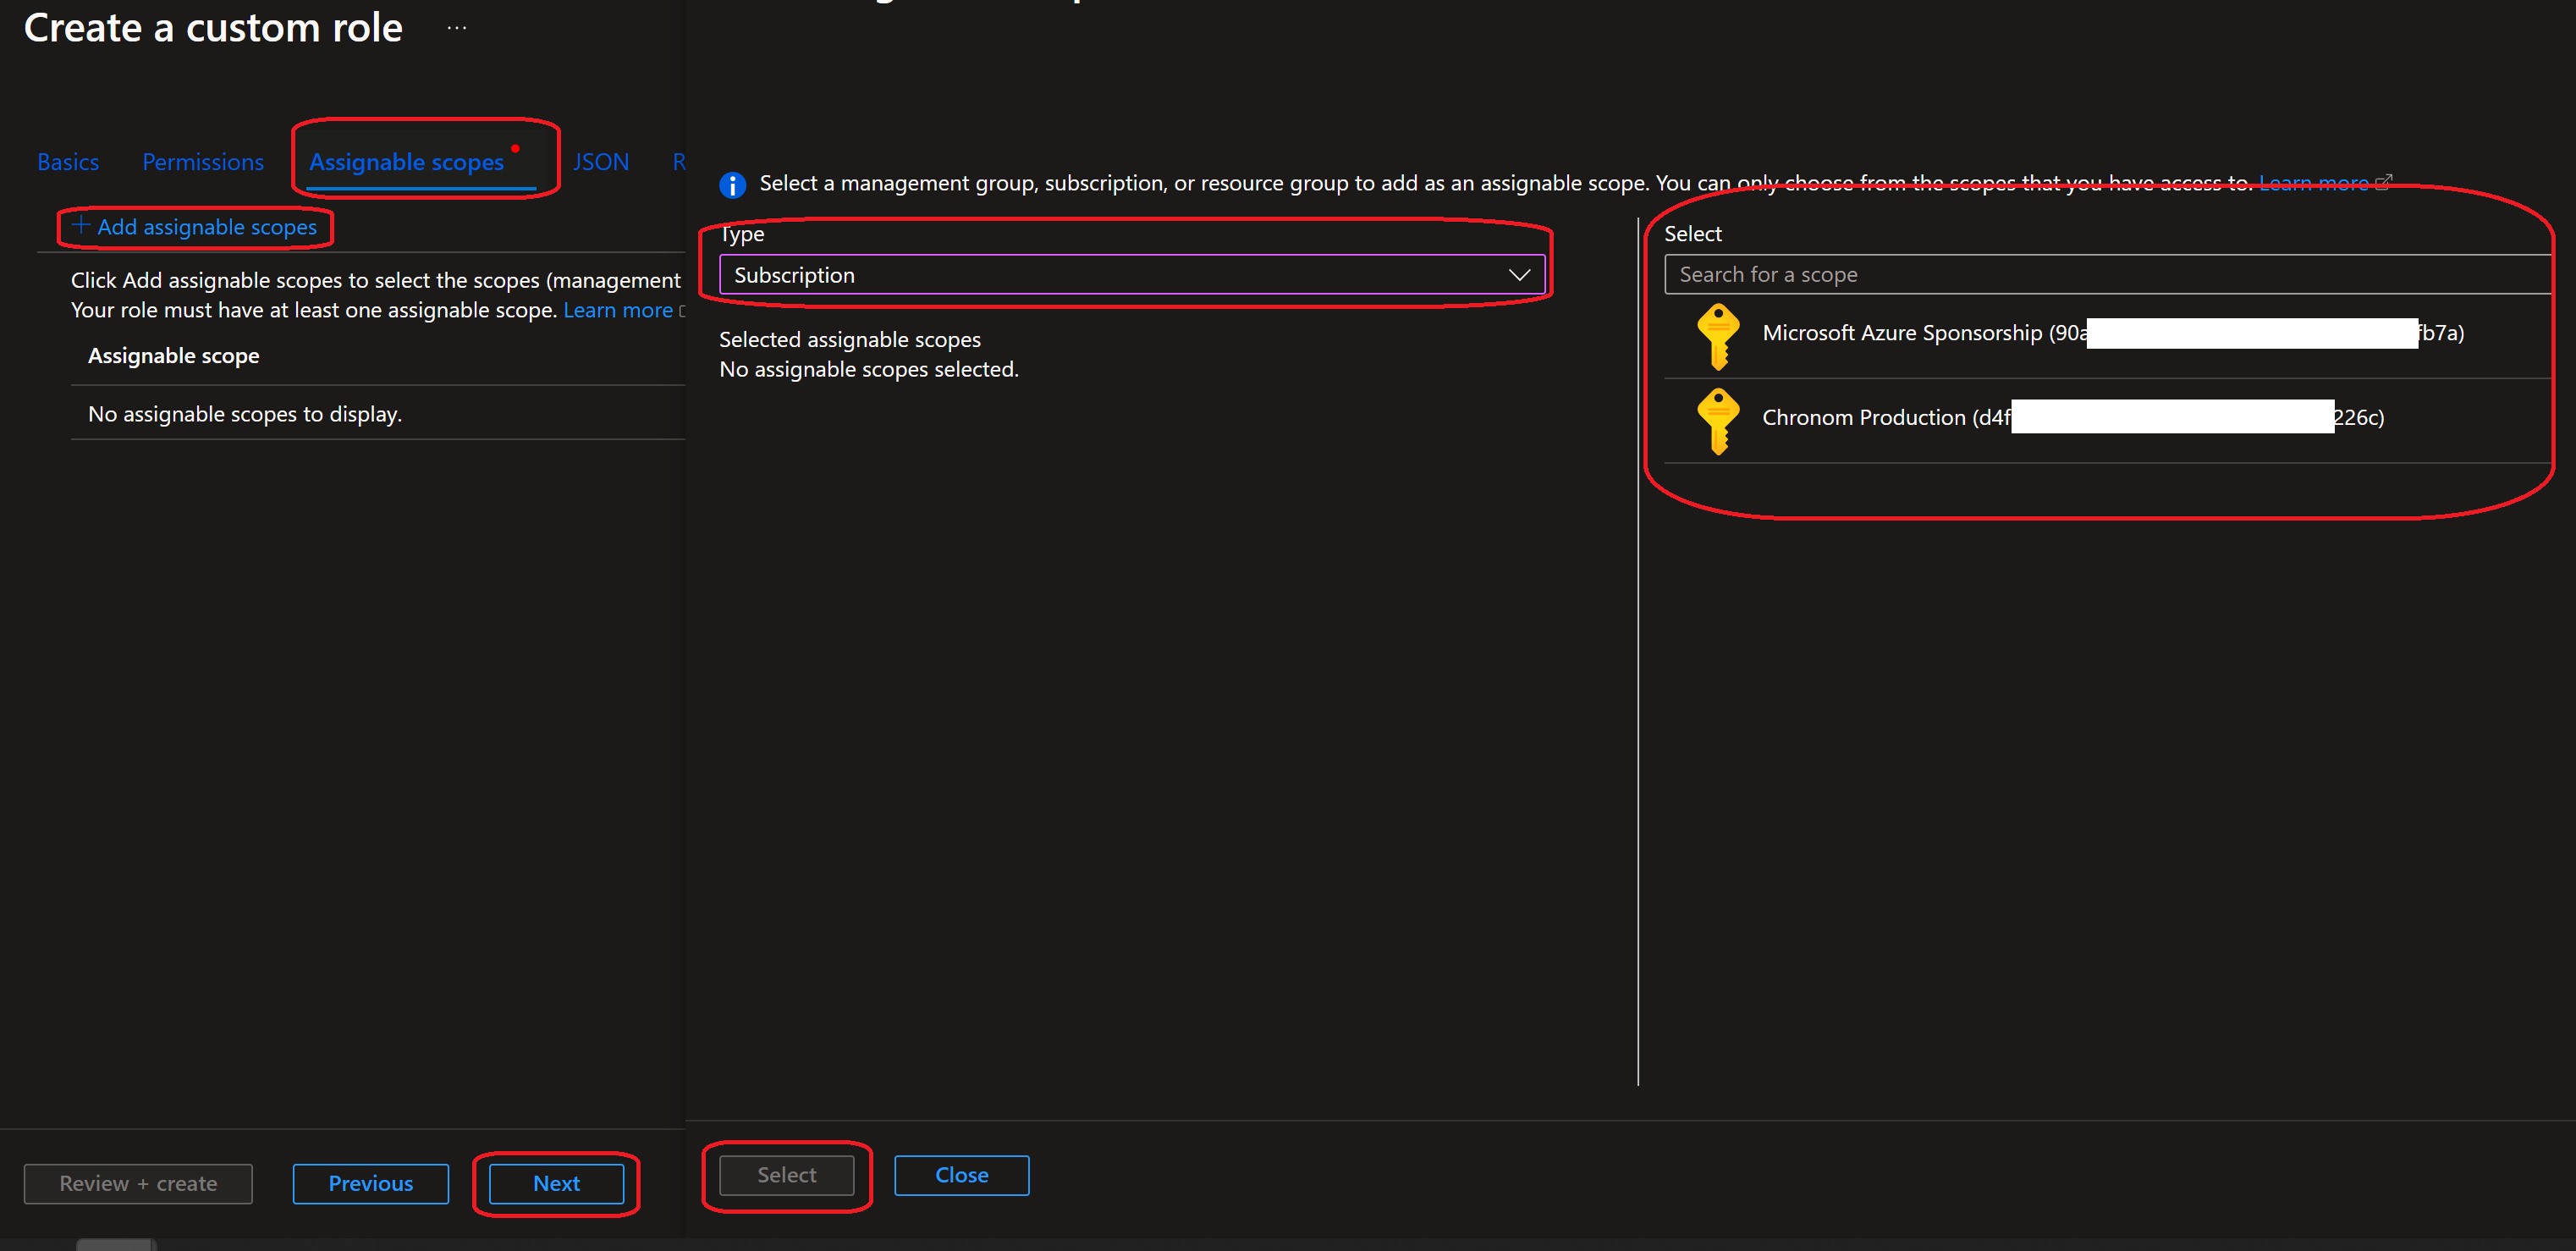
-
Review the role JSON and click on the
Review + createbutton. If you prefer, you can modify the role permissions by clicking on theEditbutton.
(any of the permissions can be removed except for the*/readpermissions.) -
Review the role details and click on the
Createbutton once you are ready.
All steps below should be executed in the same bash session.
It is recommended to copy and paste the commands one by one to avoid any mistakes.
The steps below assume you have Azure CLI installed and configured with the necessary permissions.
If you haven't installed Azure CLI yet, you can follow the instructions here.
-
If not already installed, install the
curlandsedpackages according to your specific OS. -
Authenticate Azure CLI with the Tenant where your subscriptions are by running the following command:
az login -
Configure the subscription you want to create the custom role in by running the following command:
⚠️ Replace<subscription-id>with the ID of the subscription you want to create the custom role in.subscriptionId="<subscription-id>"
az account set --subscription $subscriptionId -
Download the
Chronom Custom Role JSONfile by running the following command:jsonFilePath="/tmp/chronom-custom-role-cli.json"
curl -o $jsonFilePath "https://docs.chronom.ai/assets/files/chronom-custom-role-cli.json"
sed -i "s/xxxxxxxx-xxxx-xxxx-xxxx-xxxxxxxxxxxx/$subscriptionId/g" $jsonFilePath -
Create the custom role by running the following command:
az role definition create --role-definition @$jsonFilePath
The complete bash script
# Login to Azure CLI
az login
# Set the subscription
subscriptionId="<subscription-id>"
az account set --subscription $subscriptionId
# Download the Chronom Custom Role JSON file
jsonFilePath="/tmp/chronom-custom-role-cli.json"
curl -o $jsonFilePath "https://docs.chronom.ai/assets/files/chronom-custom-role-cli.json"
sed -i "s/xxxxxxxx-xxxx-xxxx-xxxx-xxxxxxxxxxxx/$subscriptionId/g" $jsonFilePath
# Create the custom role
az role definition create --role-definition @$jsonFilePath
All steps below should be executed in the same PowerShell session.
It is recommended to copy and paste the commands one by one to avoid any mistakes.
The steps below assume you have Azure CLI installed and configured with the necessary permissions.
If you haven't installed Azure CLI yet, you can follow the instructions here.
-
Authenticate Azure CLI with the Tenant where your subscriptions are by running the following command:
az login -
Configure the subscription you want to create the custom role in by running the following command:
⚠️ Replace<subscription-id>with the ID of the subscription you want to create the custom role in.$subscriptionId="<subscription-id>"
az account set --subscription $subscriptionId -
Download the
Chronom Custom Role JSONfile by running the following command:$jsonFilePath="$env:USERPROFILE\Downloads\chronom-custom-role-cli.json"
Invoke-WebRequest -Uri "https://docs.chronom.ai/assets/files/chronom-custom-role-cli.json" -OutFile $jsonFilePath
(Get-Content $jsonFilePath) -replace "xxxxxxxx-xxxx-xxxx-xxxx-xxxxxxxxxxxx", $subscriptionId | Set-Content $jsonFilePath -
Create the custom role by running the following command:
az role definition create --role-definition $jsonFilePath
The complete PowerShell script
# Login to Azure CLI
az login
# Set the subscription
$subscriptionId="<subscription-id>"
az account set --subscription $subscriptionId
# Download the Chronom Custom Role JSON file
$jsonFilePath="$env:USERPROFILE\Downloads\chronom-custom-role-cli.json"
Invoke-WebRequest -Uri "https://docs.chronom.ai/assets/files/chronom-custom-role-cli.json" -OutFile $jsonFilePath
(Get-Content $jsonFilePath) -replace "xxxxxxxx-xxxx-xxxx-xxxx-xxxxxxxxxxxx", $subscriptionId | Set-Content $jsonFilePath
# Create the custom role
az role definition create --role-definition $jsonFilePath
Grant Permissions to the App Registration
To grant permissions to the App Registration, Follow these steps:
- Azure Portal
- Azure CLI (bash)
- Azure CLI (PowerShell)
-
Open the Azure Portal.
-
Navigate to the Azure Subscription you want to grant permissions to.
-
Click on the
Access Control (IAM)blade. -
Click on the
+ Addbutton and selectAdd role assignment.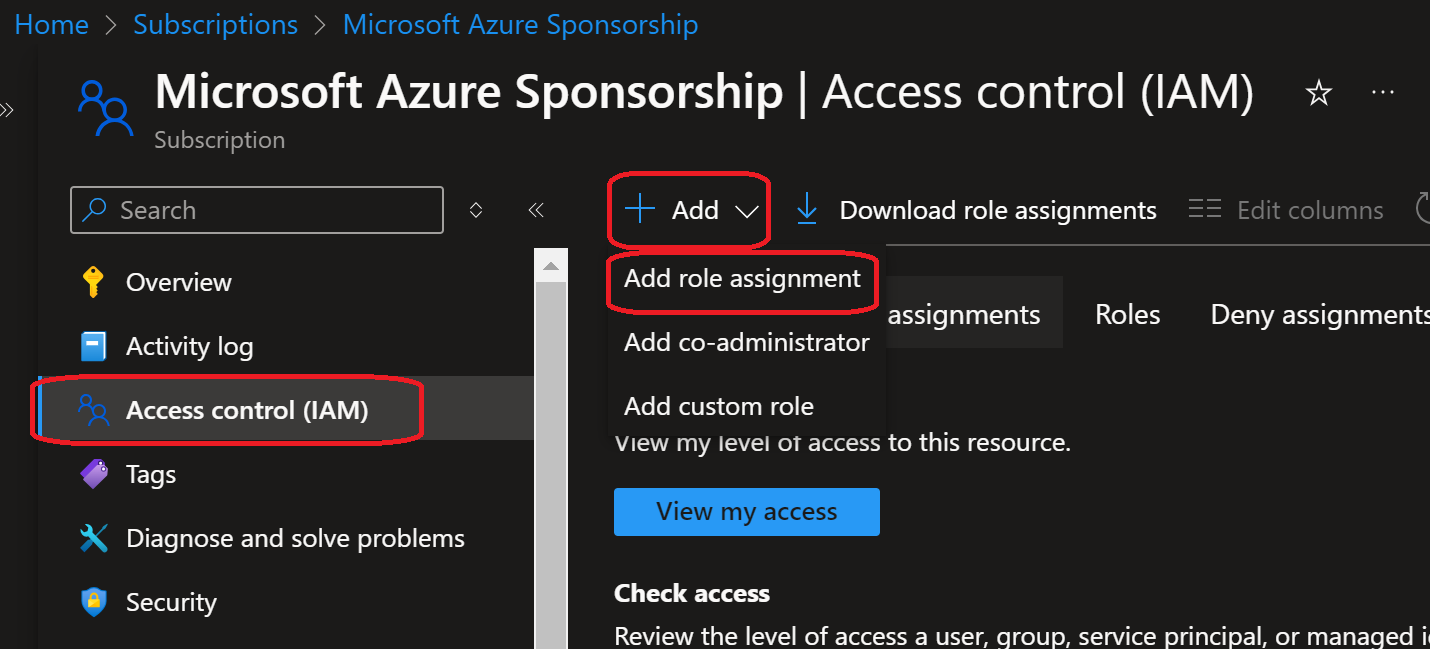
-
Search for the Role that will be assigned to the App Registration.
If you created a custom role in the previous stage, search for the role name you created (Most likelyChronom Reader), otherwise, search for theReaderrole.
Select the role and click on theNextbutton.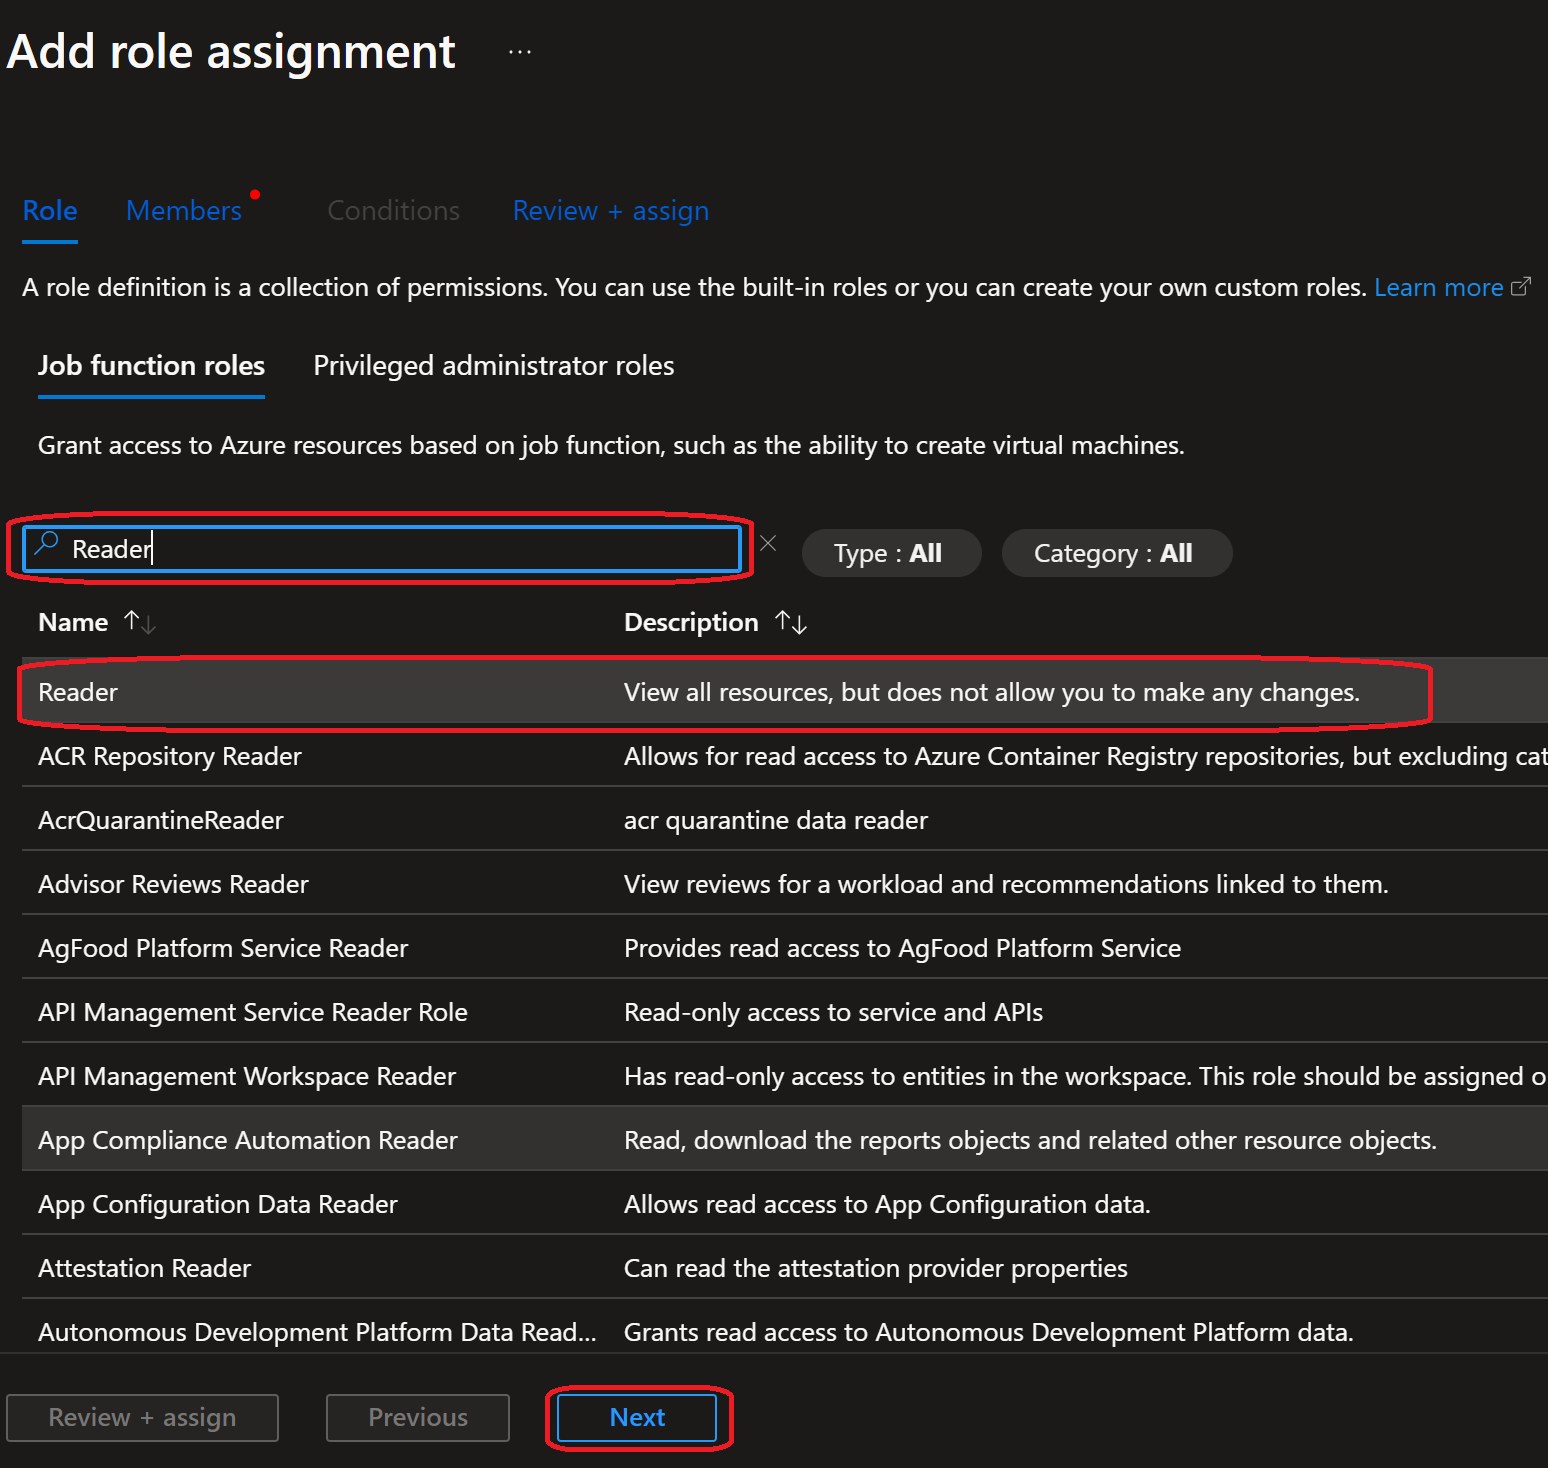
-
Click on the
+ Select membersand search forChronom Read-Only App Registration(or the name you gave to the App Registration).
Select the App Registration and click on theSelectbutton then clickNext.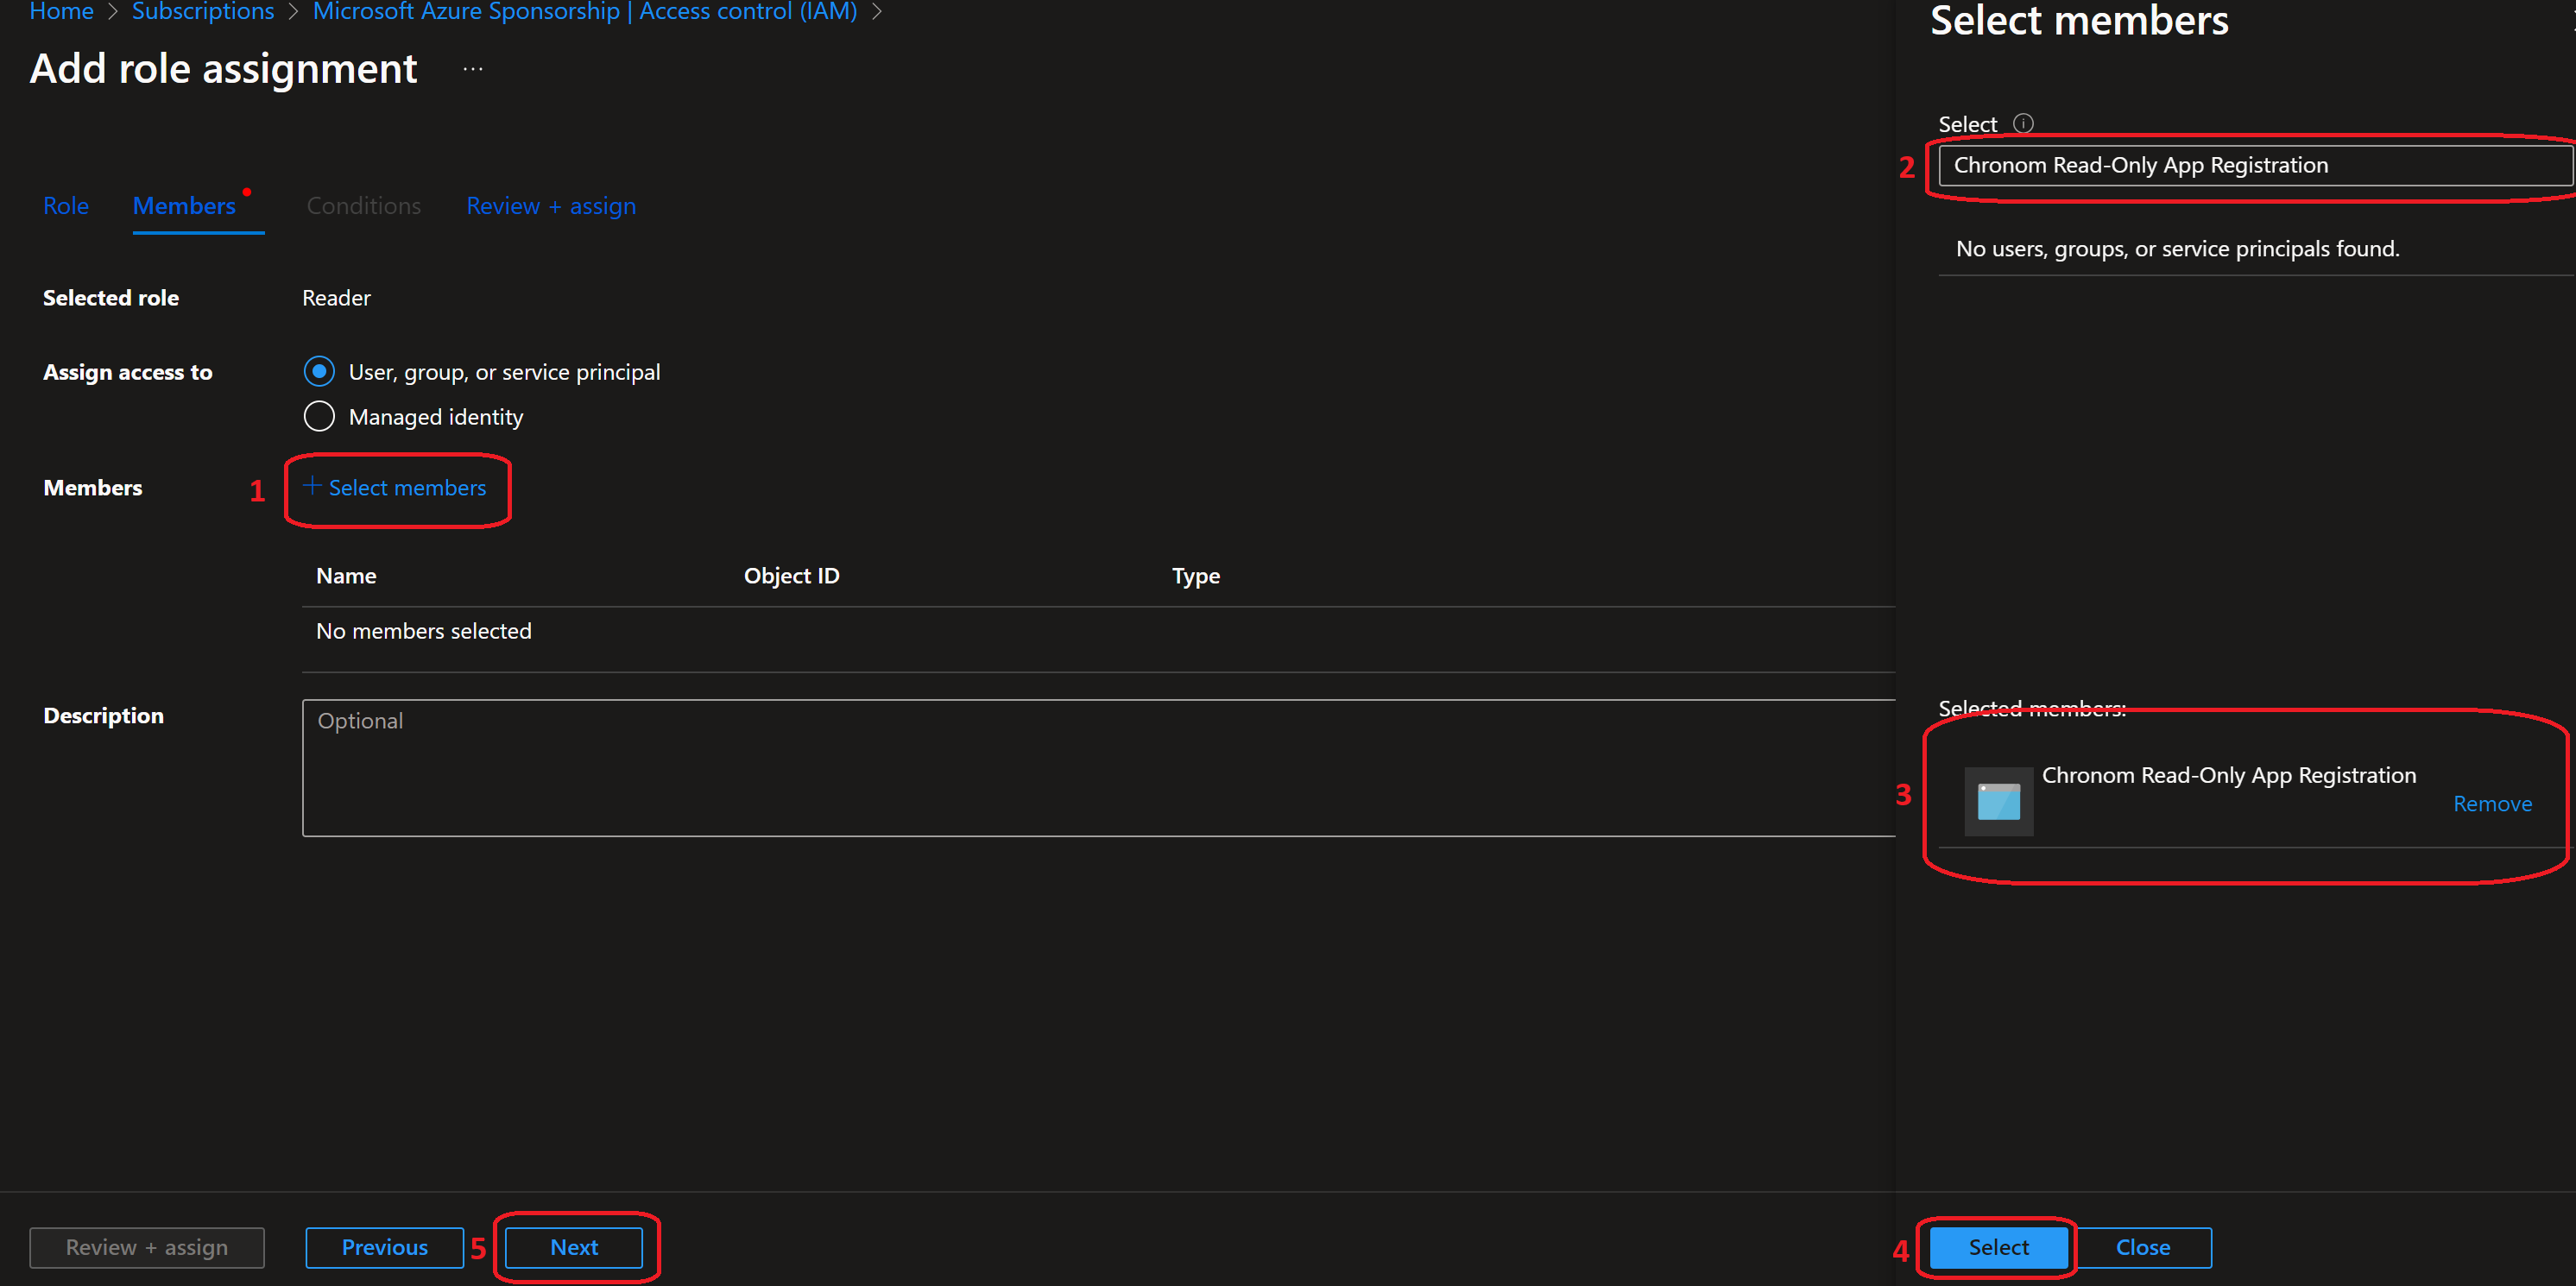
-
Click on the
Review + assignbutton. -
On a new tab, navigate to Chronom's Integrations Page and click on the
+ Add a subscription under <Your Tenant Name>button.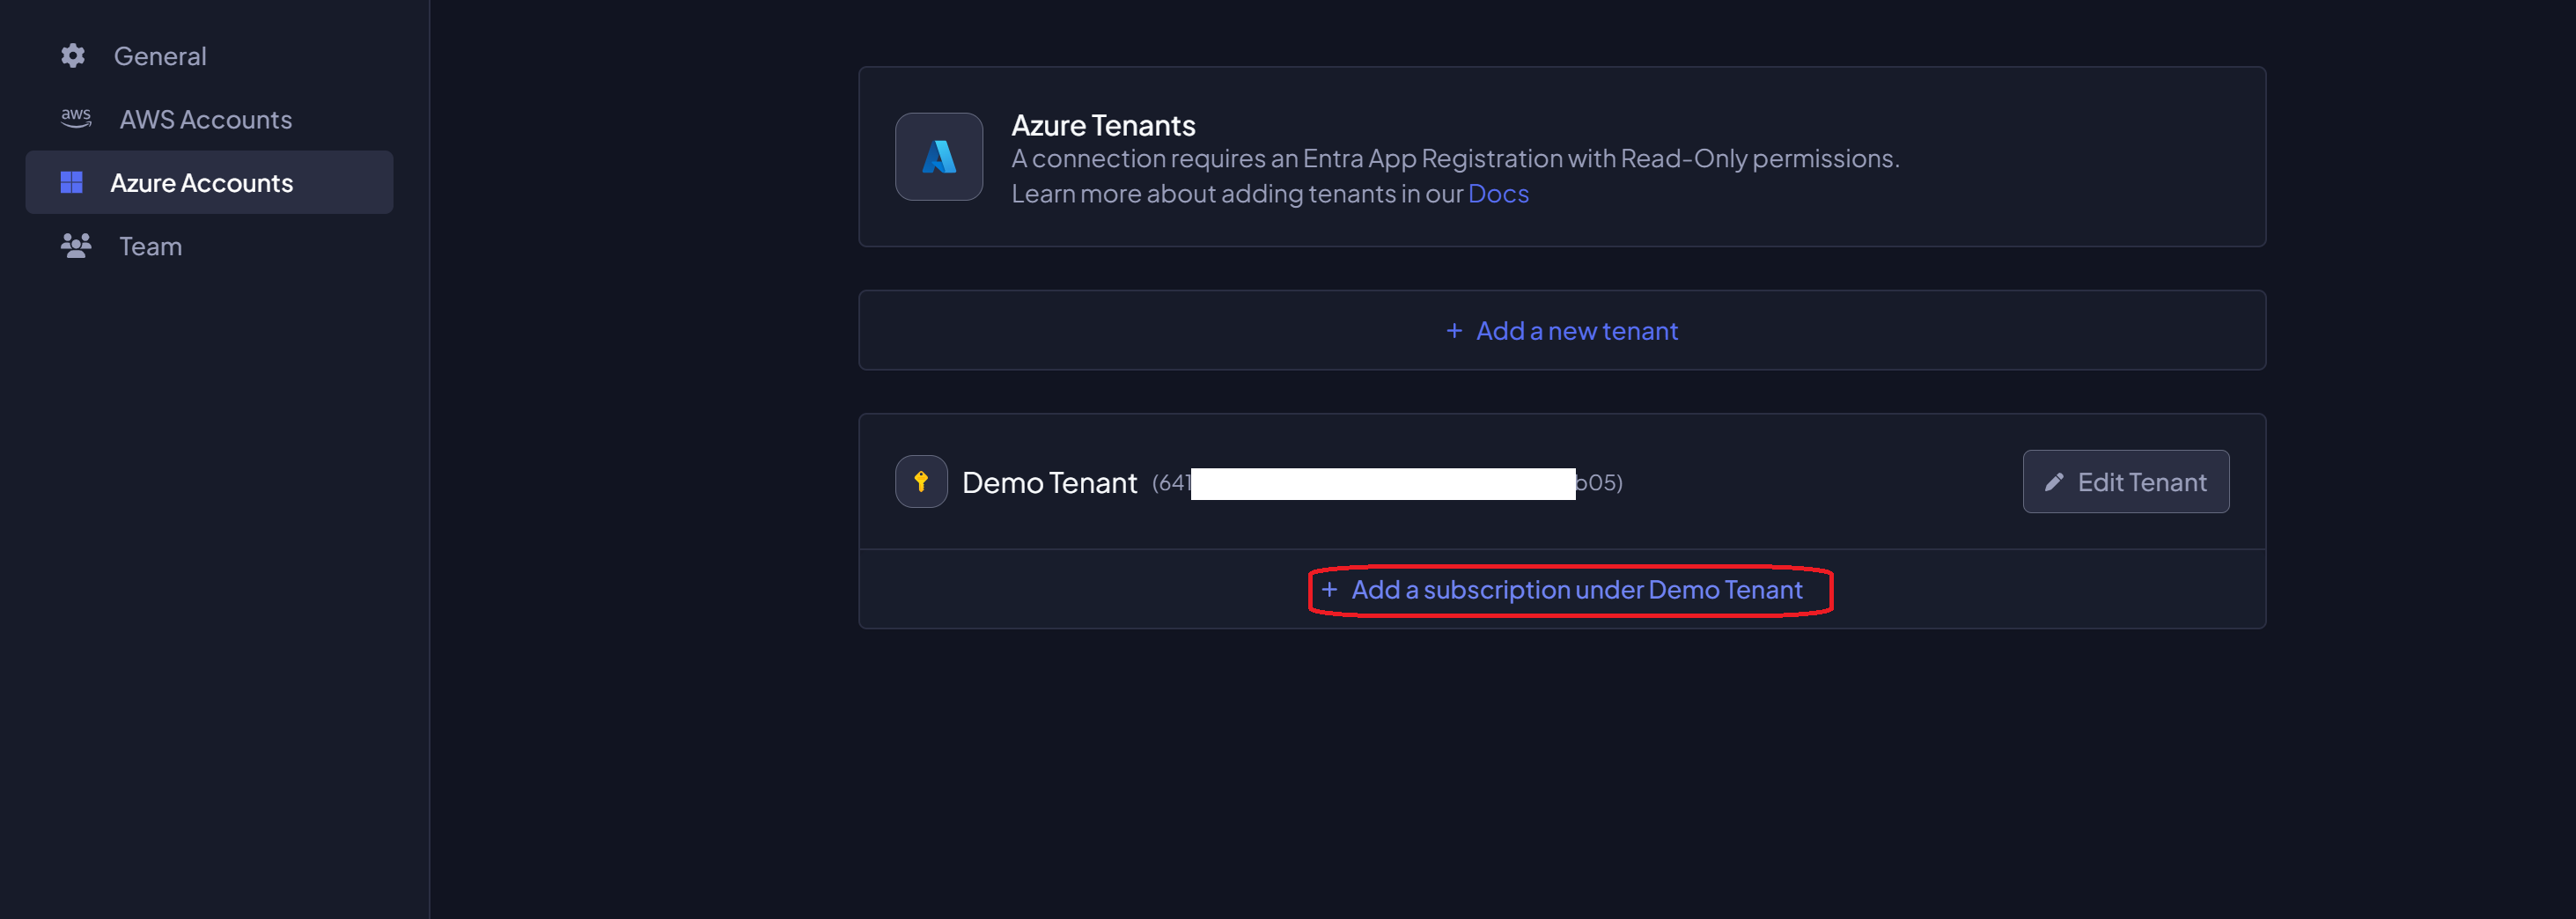
-
Copy the
Subscription IDand paste it in theSubscription IDfield on the Azure Portal, then select the rate of scans for the subscription and click on theSavebutton.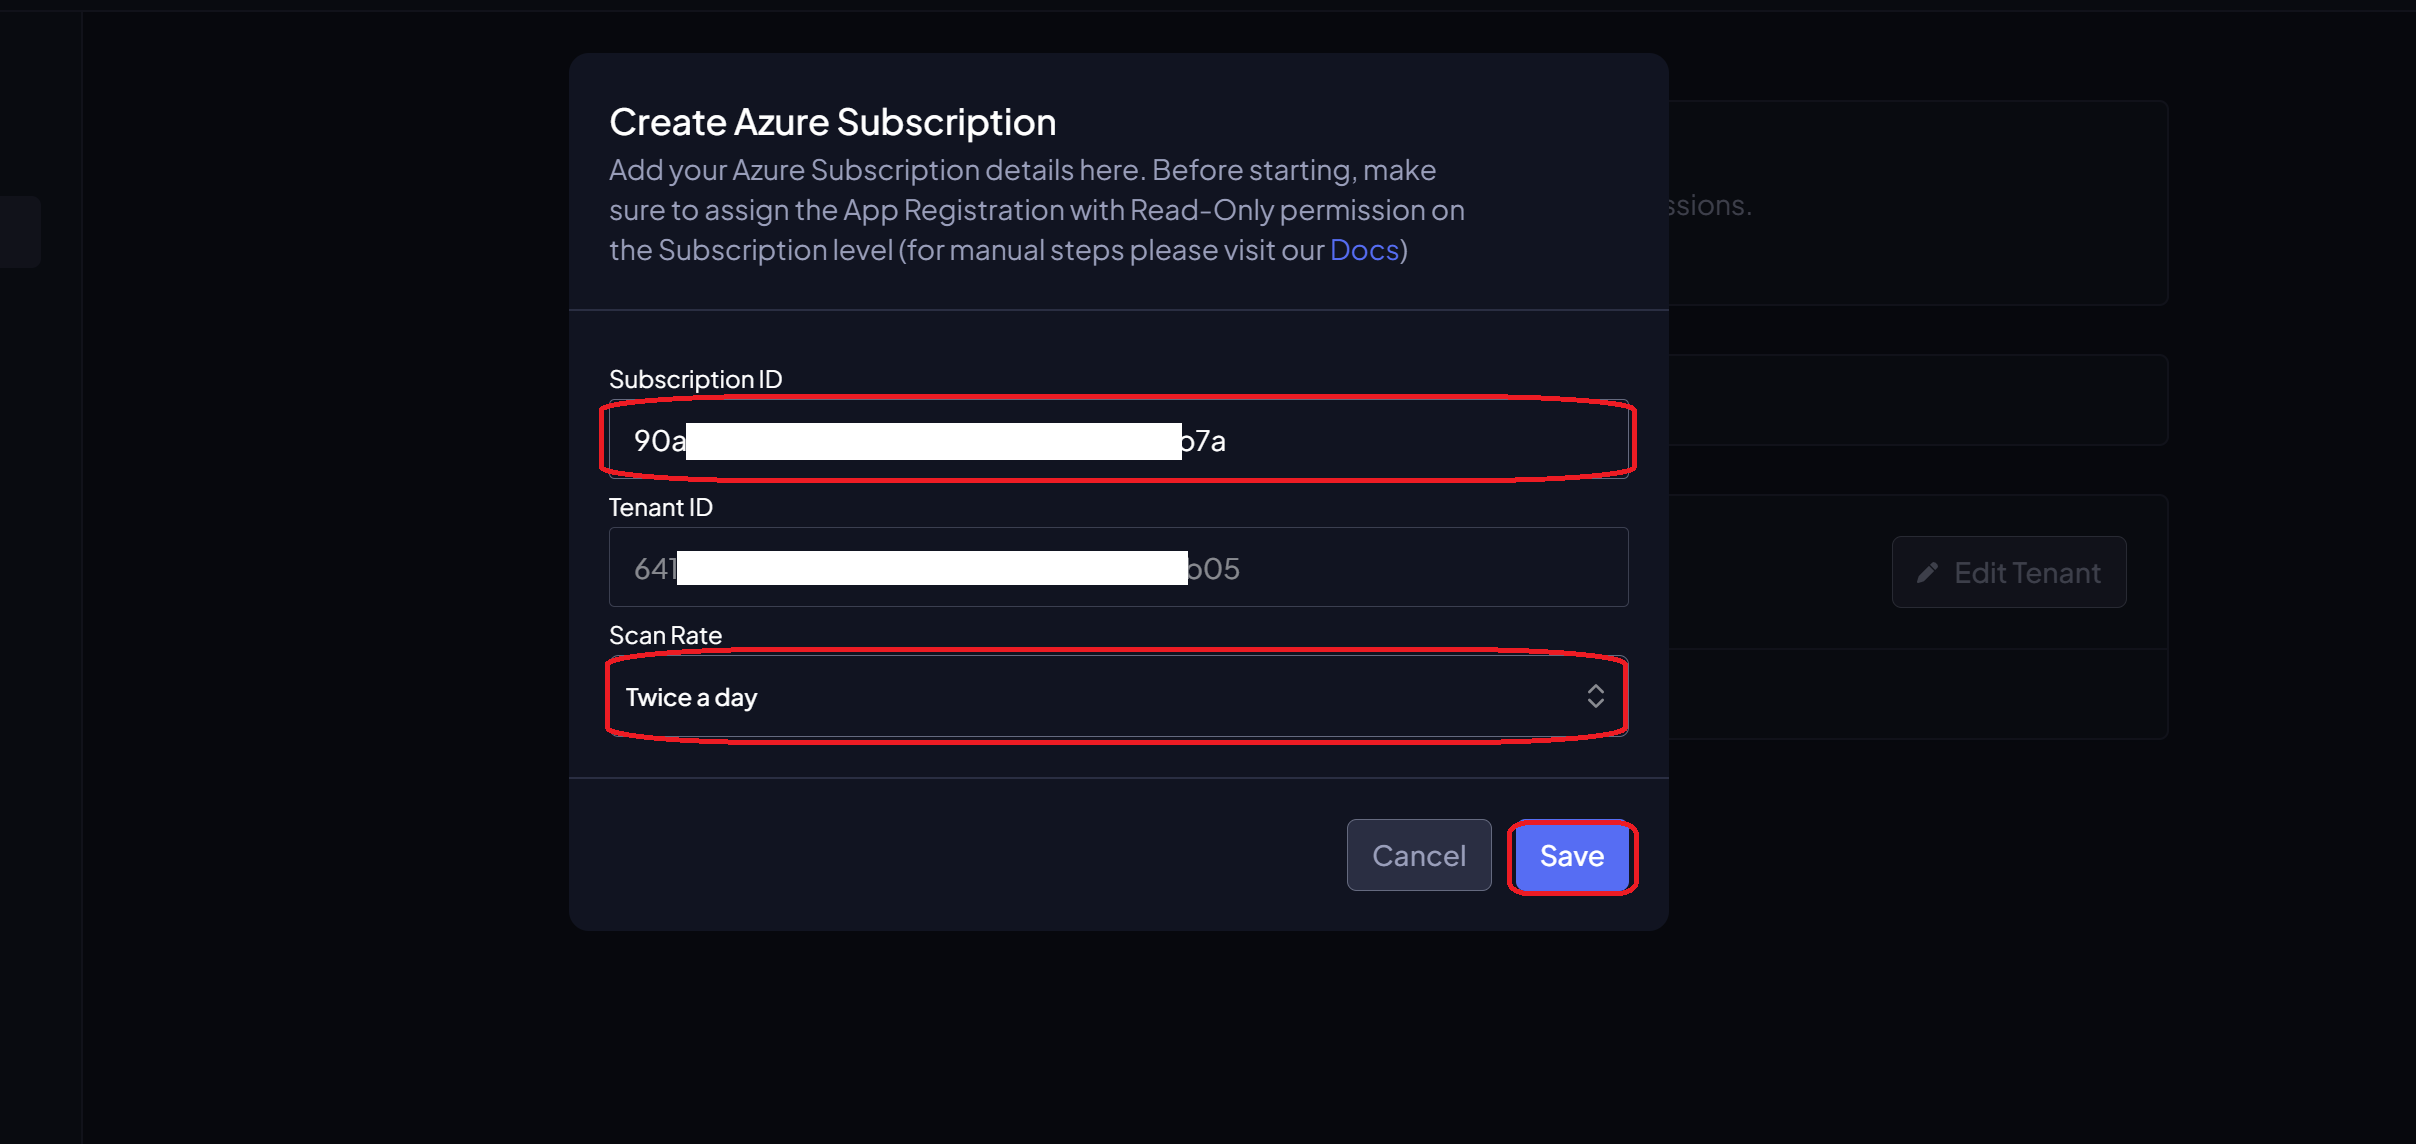
All steps below should be executed in the same bash session.
It is recommended to copy and paste the commands one by one to avoid any mistakes.
The steps below assume you have Azure CLI installed and configured with the necessary permissions.
If you haven't installed Azure CLI yet, you can follow the instructions here.
-
Authenticate Azure CLI with the Tenant where your subscriptions are by running the following command:
az login -
Configure the subscription you want to grant permissions to by running the following command:
⚠️ Replace<subscription-id>with the ID of the subscription you want to grant permissions to.subscriptionId="<subscription-id>"
az account set --subscription $subscriptionId -
Get the App Registration's SP ID by running the following commands:
appName="Chronom Read-Only App Registration"
spId=$(az ad sp list --display-name "$appName" --query "[0].id" -o tsv) -
Confirm the App Registration's SP ID by running the following command: (Make sure the output contains the
appDisplayNameasChronom Read-Only App Registrationand thereplyUrlsashttps://app.chronom.ai)echo $spId
az ad sp show --id $spId -
Assign the role to the App Registration by running the following command:
⚠️ Replace<role-name>with the name of the role you created in the previous step. (Most likelyChronom Reader) (If you opted to use theReaderrole, replace<role-name>withReader)roleName="<role-name>" # Replace with the role name you created / Reader
az role assignment create --role "$roleName" --assignee "$spId" --scope "/subscriptions/$subscriptionId" -
Navigate to Chronom's Integrations Page and click on the
+ Add a subscription under <Your Tenant Name>button. -
Copy the
Subscription IDand paste it in theSubscription IDfield on the Azure Portal, then select the rate of scans for the subscription and click on theSavebutton.
The complete bash script
# Login to Azure CLI
az login
# Set the variables
subscriptionId="<subscription-id>"
appName="Chronom Read-Only App Registration"
roleName="Chronom Reader" # Replace with the role name you created / Reader
# Set the subscription
az account set --subscription $subscriptionId
# Get the App Registration's SP ID
spId=$(az ad sp list --display-name "$appName" --query "[0].id" -o tsv)
# Confirm the App Registration's SP ID
echo $spId
az ad sp show --id $spId
# Assign the role to the App Registration
az role assignment create --role "$roleName" --assignee "$spId" --scope "/subscriptions/$subscriptionId"
All steps below should be executed in the same PowerShell session.
It is recommended to copy and paste the commands one by one to avoid any mistakes.
The steps below assume you have Azure CLI installed and configured with the necessary permissions.
If you haven't installed Azure CLI yet, you can follow the instructions here.
-
Authenticate Azure CLI with the Tenant where your subscriptions are by running the following command:
az login -
Configure the subscription you want to grant permissions to by running the following command:
⚠️ Replace<subscription-id>with the ID of the subscription you want to grant permissions to.$subscriptionId="<subscription-id>"
az account set --subscription $subscriptionId -
Get the App Registration's SP ID by running the following commands:
$appName="Chronom Read-Only App Registration"
$spId=(az ad sp list --display-name $appName --query "[0].id" -o tsv) -
Confirm the App Registration's SP ID by running the following command:
(Make sure the output contains theappDisplayNameasChronom Read-Only App Registrationand thereplyUrlsashttps://app.chronom.ai)$spId
az ad sp show --id $spId -
Assign the role to the App Registration by running the following command:
⚠️ Replace<role-name>with the name of the role you created in the previous step. (Most likelyChronom Reader) (If you opted to use theReaderrole, replace<role-name>withReader)$roleName="Chronom Reader" # Replace with the role name you created / Reader
az role assignment create --role $roleName --assignee $spId --scope "/subscriptions/$subscriptionId" -
Navigate to Chronom's Integrations Page and click on the
+ Add a subscription under <Your Tenant Name>button. -
Copy the
Subscription IDand paste it in theSubscription IDfield on the Azure Portal, then select the rate of scans for the subscription and click on theSavebutton.
The complete PowerShell script
# Login to Azure CLI
az login
# Set the variables
$subscriptionId="<subscription-id>"
$appName="Chronom Read-Only App Registration"
$roleName="Chronom Reader" # Replace with the role name you created / Reader
# Set the subscription
az account set --subscription $subscriptionId
# Get the App Registration's SP ID
$spId=(az ad sp list --display-name $appName --query "[0].id" -o tsv)
# Confirm the App Registration's SP ID
$spId
az ad sp show --id $spId
# Assign the role to the App Registration
az role assignment create --role $roleName --assignee $spId --scope "/subscriptions/$subscriptionId"
Grant Reservation Permissions
-
Browse to the Reservations page in the Azure Portal.
-
Click on
Role assignmentsin the right-hand side menu.
-
Click on the
+ Addbutton and selectAdd role assignment.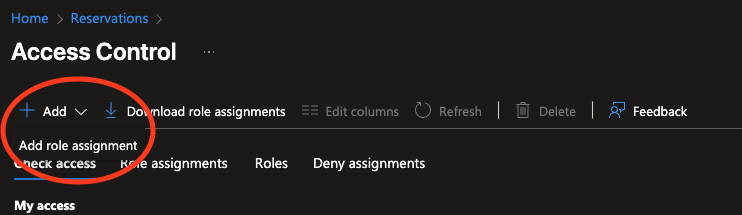
-
In the Role assignment page:
- Role: Select
Reservation Reader - Assign access to: Select
User, group, or service principal - Members: Search for and select
Chronom Read-Only App Registration(the app registration created in previous steps) - Click
Review + assignand thenAssign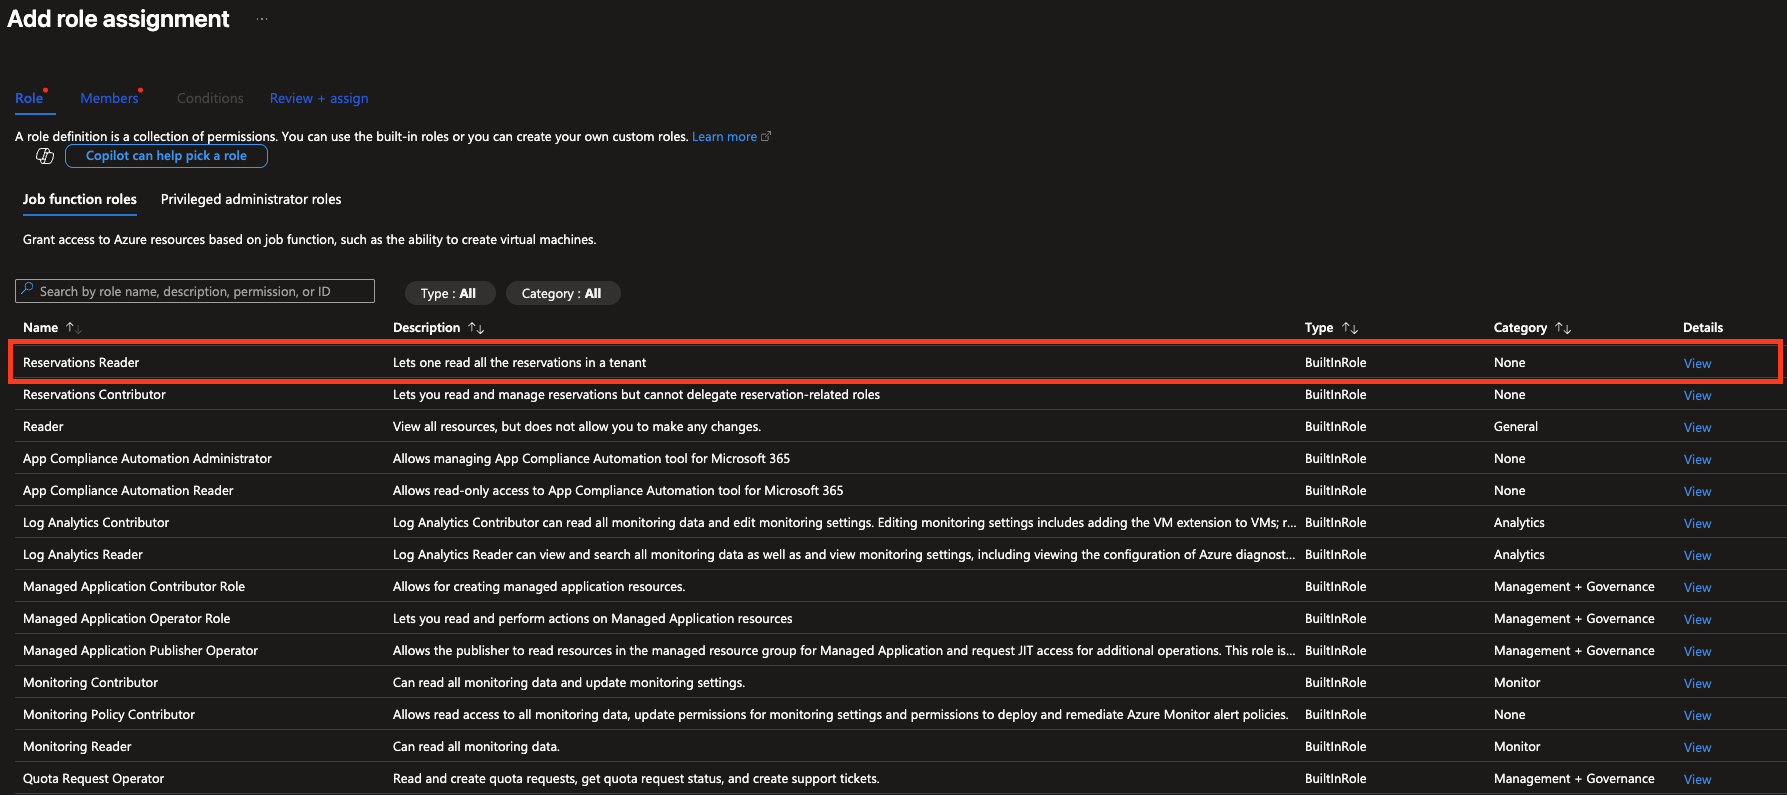
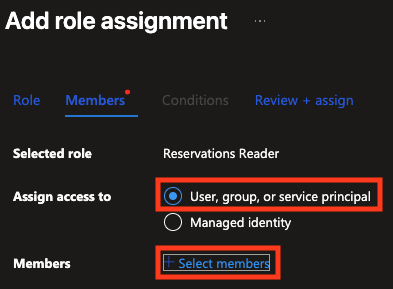
noteThe Reservation Reader role allows the App Registration to read reservation details and utilization data, which is necessary for cost optimization insights in Chronom.
- Role: Select